How to Solder Copper Pipe Without Leaks
The short version
Joints leak because of what happened before the torch was lit. Abrade the copper to bright metal, flux both surfaces thinly, make sure there is no water in the line, and heat the fitting from underneath so capillary action pulls the solder up through the gap. Use lead-free solder on any potable line. That is the whole method.
Getting a plumber out to redo one joint costs more than every tool below combined. People pay it anyway, because a joint that fails behind plasterboard doesn't drip politely.
The fear is understandable and mostly misplaced. Soldering copper is a short checklist, and the parts that decide the outcome happen before you light anything.
What you need
Torch and gas. Propane in the blue cylinder handles 1/2" and 3/4" tube without complaint. Yellow cylinders get you MAP-Pro, which runs hotter and is worth having for 1" and up, or for joints sitting against a heat sink like a valve body.
Abrasives. Emery cloth for the outside of the tube, a wire fitting brush for the inside of the socket. Get the brush that chucks into a cordless driver. It turns the most tedious step into a two-second one and you will actually do it properly.
Flux. Any standard plumbing flux. This is the item beginners skip.
Solder. Lead-free, 95/5 tin-antimony, for anything carrying drinking water. In the US this is law, not preference: solder and flux are capped at 0.2% lead, and wetted surfaces of pipe and fittings at a 0.25% weighted average. Old 50/50 tin-lead is still legal on waste lines, but the two spools look nearly identical on the shelf and lead-free works on both. Buy one spool and remove the decision.
Clean it until it shines
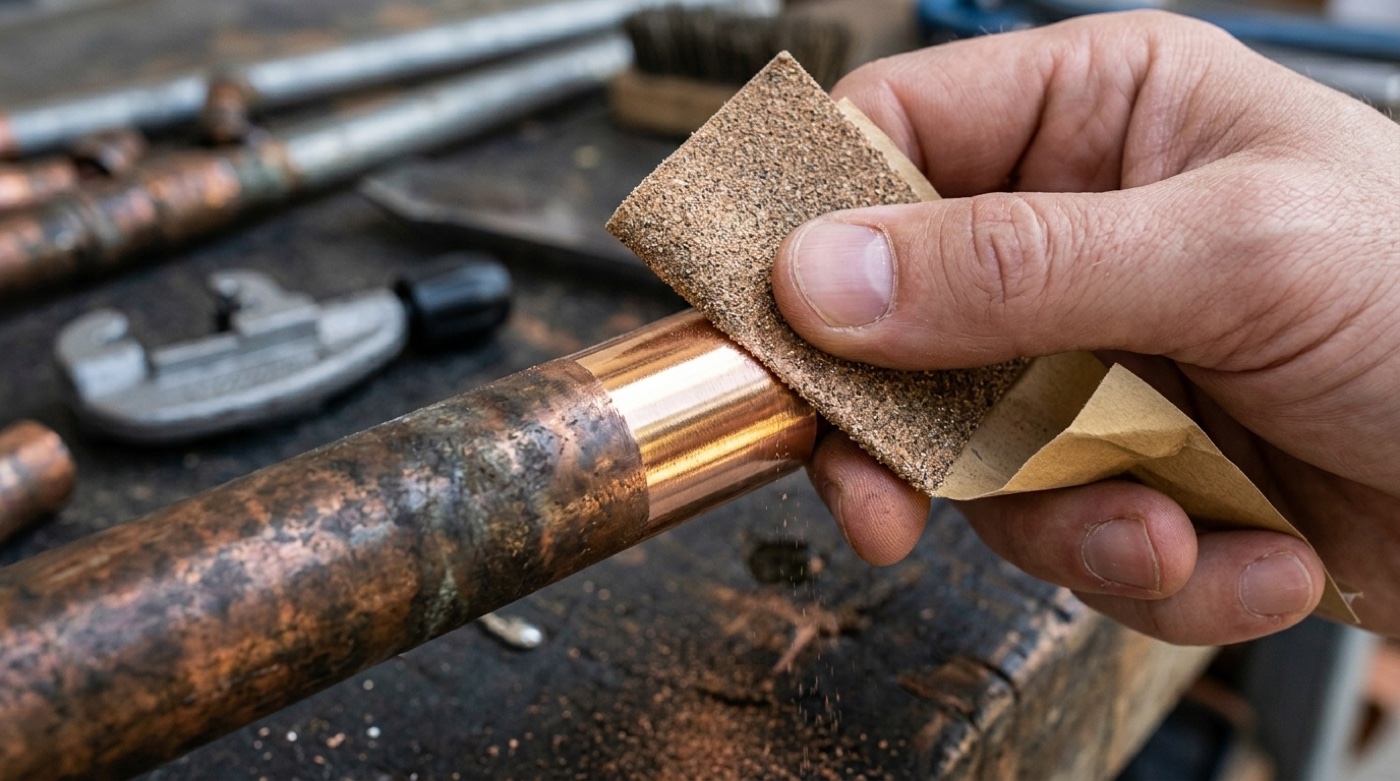
Copper that looks clean isn't. A dull oxide film forms in air within hours and solder will not wet through it.
Run emery cloth over the last inch or so of tube until the surface is uniformly bright pink-gold, then brush out the fitting socket. Dull patches are the ones that leak. Don't handle the cleaned surface afterwards, because skin oil is enough to stop solder wetting in that spot.
Flux, thinly, both sides
Flux does two jobs. It strips the oxide off hot copper, and it stops fresh oxide forming while the metal sits at temperature. Without it molten solder beads up and rolls off, the way water does on a waxed car.
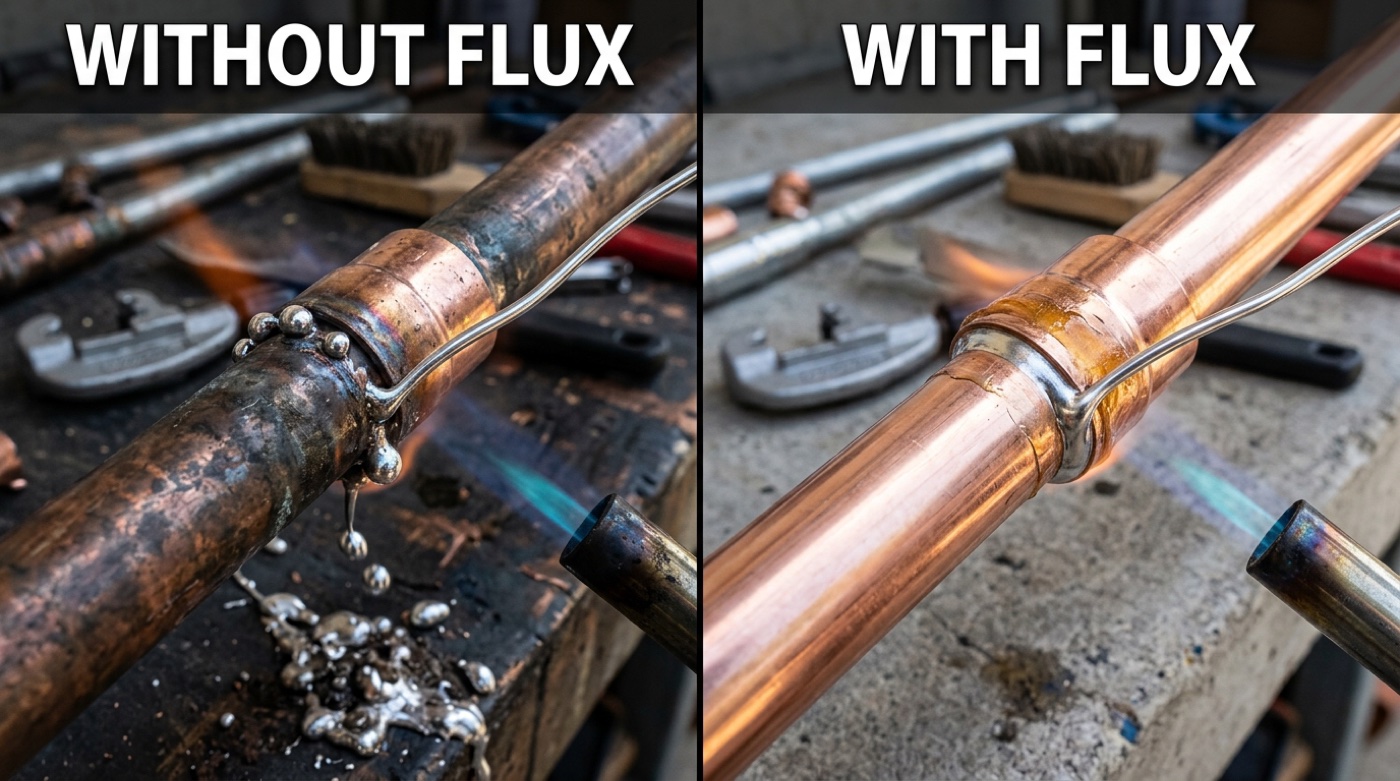
A thin even film on both surfaces is all you need. Thick flux burns, carbonises, and leaves residue you then have to scrub off. Push the joint together and give it a quarter turn to spread it.
Check that the line is dry
Water inside the tube holds the copper at 100°C. The joint cannot reach soldering temperature while that water is there, however long you hold the flame on it, and you will stand there burning gas and flux convinced your torch is faulty.
Drain the system and open a tap or valve at a low point to break the vacuum. If a slow trickle keeps coming, dam it. Soldering plugs are sold for this, and a wad of white bread pushed into the tube does the same job and flushes out when the water goes back on.
Skip this check and nothing further down the list can work.
Heat from underneath
Solder isn't poured into a joint. It's pulled in.
The gap between tube and fitting is a few thousandths of an inch. At the right temperature, molten solder travels along that gap by capillary action, the same force that draws liquid up a narrow straw against gravity. Your job is to get the metal to that temperature and then stay out of the way.
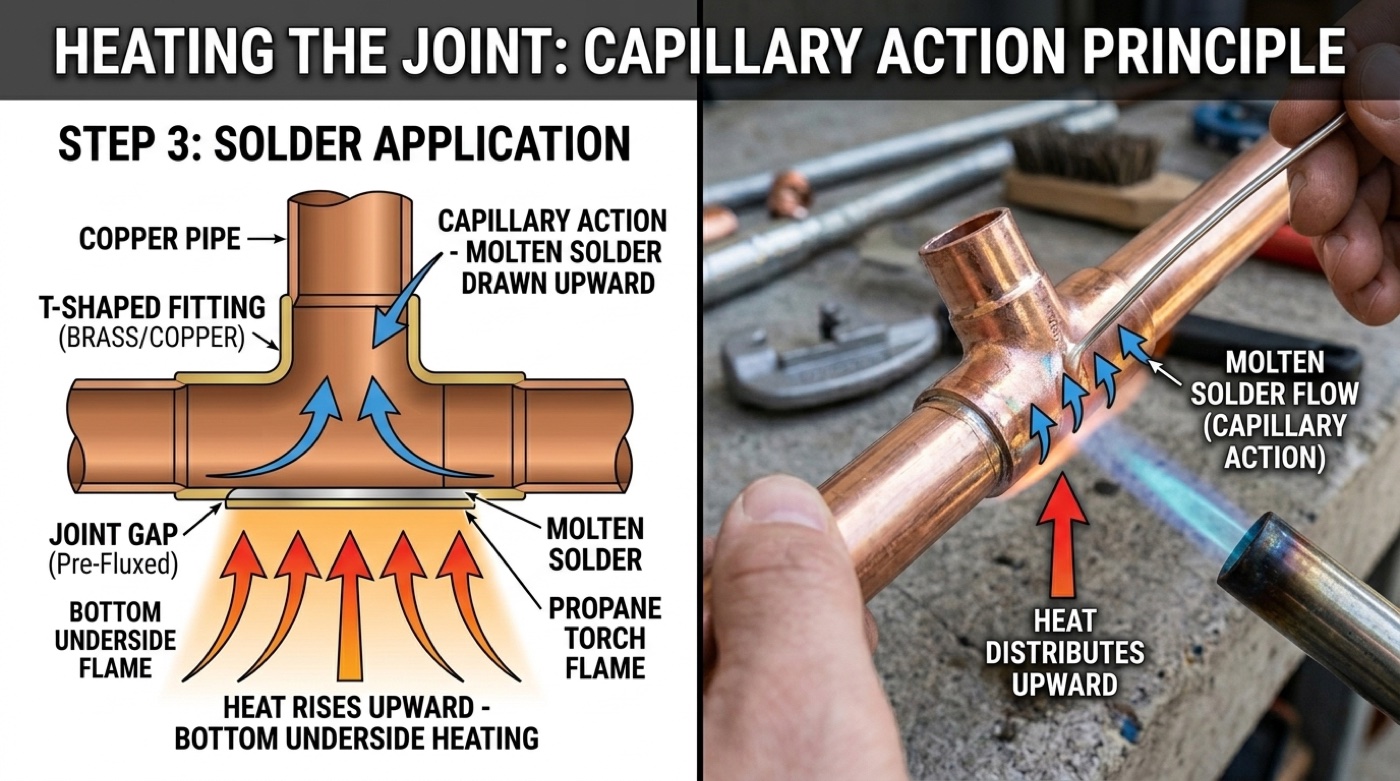
Put the flame on the underside of the fitting, not the tube, and keep it moving. Heat rises, so warming the bottom brings the top up with it.
Heat the top first and you create a cold trap. Solder melts up there, runs down into copper that is still cold, and freezes in the gap before the joint has filled. From outside it looks finished. Inside it's hollow, and it weeps the first time you pressurise.
After twenty or thirty seconds, touch the solder to the joint away from the flame. If it smears, keep heating. When it melts on contact and vanishes into the gap, that's your moment. Run it around the full circumference until a thin bead shows all the way round, then stop. Half an inch of wire does a half-inch joint. Solder piled on the outside adds nothing, and usually means the joint got too hot.
Let it cool on its own
Don't reach for the wet rag.
Quenching a joint that is still solidifying builds stress into it. What you get is not a visible crack, it's a microscopic one that holds pressure on test day and weeps six months later inside a wall.
Two or three minutes of air cooling is enough. Then wipe the flux residue off with a dry cloth, because flux is mildly acidic and will corrode the outside of the tube and leave green staining if you leave it there.
The temperatures that actually matter
Three of the problems above are the same problem seen from different angles. This is the whole thing on one scale.
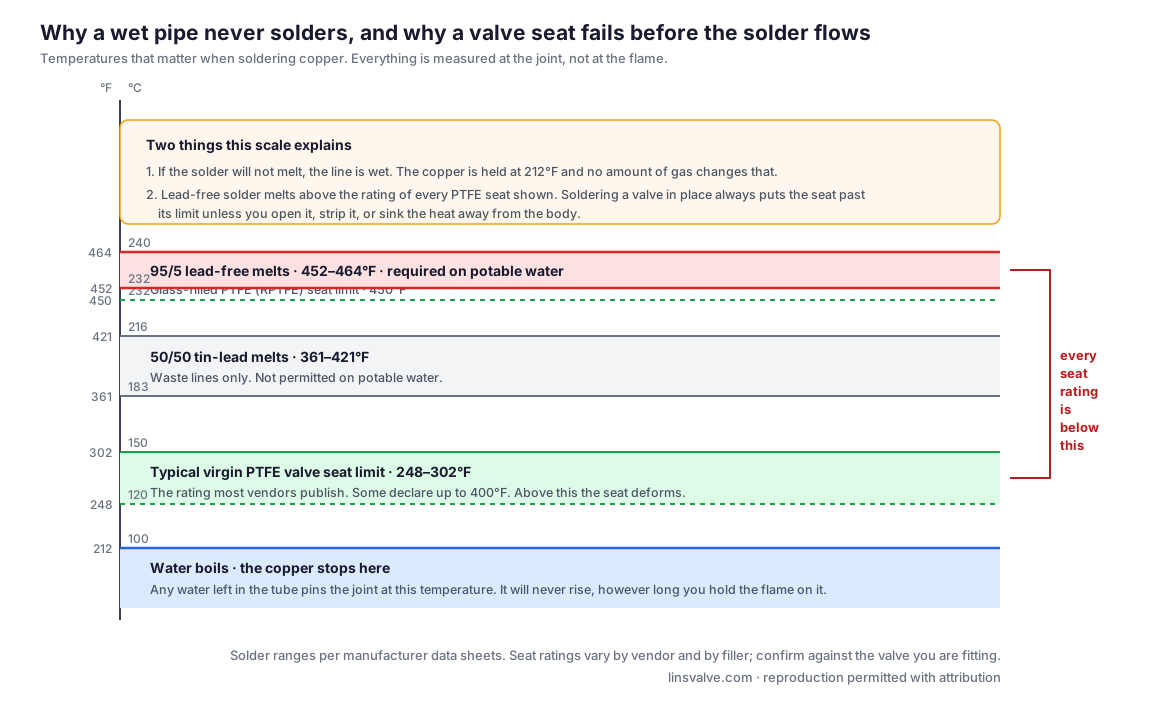
95/5 lead-free solder has a solidus of 452°F and a liquidus of 464°F. Most vendors rate virgin PTFE valve seats somewhere between 248°F and 302°F, with a few claiming 400°F, and glass-filled RPTFE reaching 450°F.
Read those two together. The solder does not begin to flow until the joint is hotter than any seat rating on the chart. Soldering a valve in place is not a case of being careful with the flame. The seat is past its limit before the solder has melted, so the only real protection is to get the heat somewhere else.
Soldering a valve into the line
Everything above applies to plain fittings. A solder-end valve needs one more thing, and skipping it ruins new valves regularly.
Ball valve seats and the internals of a mixing valve are PTFE, rated well below the temperature copper reaches while you're working on it. Heat conducted into the body deforms them. The soldered joint comes out fine and the valve seeps past the seat forever after.
- Open the valve fully before you start. A closed ball traps heat against the seats.
- Take it apart if the design lets you. Three-piece ball valves let you lift the centre section out and solder the end connections on their own, which is one of the practical reasons that body style exists.
- Keep the flame on the socket and angled away from the body. Heat sink paste or a damp cloth wrapped round the body helps on short runs.
If you're picking the valve as well as fitting it, brass vs stainless steel ball valves covers which alloy suits which water, and note that a potable line needs a certified lead-free body as well as lead-free solder. For taking the old one out, see how to replace a ball valve.
Why joints leak
| What you see | What went wrong |
|---|---|
| Solder beads and rolls off | No flux, or the copper wasn't cleaned to bright metal |
| Solder won't melt however long you heat | Water in the line holding the copper at 100°C |
| Looks perfect, weeps under pressure | Heated from the top. Solder froze in the cold lower gap before the joint filled |
| Held at first, weeps months later | Quenched while hot. A micro-crack formed as it solidified |
Three of those four were settled before the torch came out.
Common questions
Before you light it
Put a flame-resistant pad behind the joint and clear anything you can move. Heat stays in nearby timber after you have packed up, so check the area again fifteen minutes later. Keep water and an extinguisher in reach, ventilate the space, and wear eye protection. Solder drips downward, which is where your hand usually is.
References
- NSF/ANSI/CAN 372 — Drinking Water System Components: Lead Content
- Safe Drinking Water Act, lead-free definition: 0.2% for solder and flux, 0.25% weighted average across wetted surfaces
- Copper Development Association — copper tube handbook and soldering practice
General reference only. Plumbing work is subject to local code and to the authority having jurisdiction, and some jurisdictions restrict who may work on potable water systems.